


I posted a picture of my raspberry jam on instagram the other day, and someone left a comment “Please tell me it’s a tutorial with those gorgeous jars!” I had used Weck canning jars for the jam, and thought that there might be other people who wanted to know what they were and how to use them.
I’ve always adored the beauty of Weck canning jars. Last year was the first time I used them and let me tell you Bob, I AM IN LOVE. You can use them over and over again, without having to buy new lids.

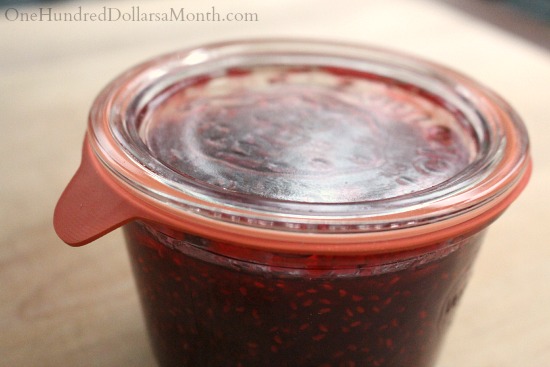
Here’s a quick guide on using Weck canning jars:
- There are 4 pieces to Weck jars. The lid, the jar, the rubber ring, and the clamps. All four components will need to be washed and sterilized in hot soapy water.

- For a hot water bath canning method, follow recipe instructions. When it comes time to put your goods into the jars, place the rubber seals in boiling water for a few minutes, just as you would disposable lids. This will soften them up and prepare them to seal.

- Fill your jars with whatever you are canning. Place the rubber seal on the lid of the jars and wipe the rims of the jars to ensure a good seal. Place the lid on the jar and click the clamps into place. The clamps will take the place of the rings in Kerr or Ball jars.
- Process your jars as you would regular canning jars. When the timer goes off and you remove your jars, be careful not to disturb the clamps when you remove the jars from the water.

- Allow the jars to cool completely. Remove the clamps and check for a good seal.
- Store jars as you would regular canning jars.


 I’ve bought Weck jars from both Amazon.com and Williams-Sonoma. They are a little expensive up front, but since you can use them over and over, I think I’ll come out ahead in the end.
~Mavis
See all my Canning Recipes HERE
This post may contain affiliate links. These affiliate links help support this site. For more information, please see my disclosure policy. Thank you for supporting One Hundred Dollars a Month.


